


We can all agree that carousels are great for showcasing our valuable content. Yet adding a carousel to your site can prove difficult.
You’ll find plenty of JavaScript or jQuery plugins and paid code snippets online but the truth is, you don’t need them – not when there’s Vanilla JS and pure CSS carousel at your disposal.
With pure vanilla JavaScript, no libraries required and about 20 lines of HTML. This carousel creates the typical slideshow style effect of the images one after the other, with smooth crossfade transitions between them.
How to use it:
1. Add images along with slide counter, navigation buttons, and pagination dots to the carousel.
<div class="carousel-wrapper" js-carousel-wrapper>
<!-- Counter -->
<div class="slide-number">
<span class="slide-number-text" js-slide-number-text> 1 / 5</span>
</div>
<!-- Images -->
<div class="carousel-item" js-carousel-item data-active-slide>
<img src="images/image-1.jpg" alt="">
</div>
<div class="carousel-item" js-carousel-item>
<img src="images/image-2.png" alt="">
</div>
<div class="carousel-item" js-carousel-item>
<img src="images/image-3.jpg" alt="">
</div>
<div class="carousel-item" js-carousel-item>
<img src="images/image-4.jpg" alt="">
</div>
<div class="carousel-item" js-carousel-item>
<img src="images/image-5.jpg" alt="">
</div>
<!-- Navigation Arrows -->
<button type="button" class="carousel-arrow prev" data-carousel-arrows data-dir="prev"> ‹ </button>
<button type="button" class="carousel-arrow next" data-carousel-arrows data-dir="next"> › </button>
<!-- Pagination Dots -->
<div class="carousel-dots" data-carousel-dots>
<button type="button" class="dots" data-active-dot js-data-dots data-dots-index="1"> </button>
<button type="button" class="dots" js-data-dots data-dots-index="2"> </button>
<button type="button" class="dots" js-data-dots data-dots-index="3"> </button>
<button type="button" class="dots" js-data-dots data-dots-index="4"> </button>
<button type="button" class="dots" js-data-dots data-dots-index="5"> </button>
</div>
</div>2. Add the following carousel styles to the page.
.carousel-wrapper {
  width: 100%;
  max-width: 600px;
  height: 300px;
  position: relative;
  display: -webkit-box;
  display: -ms-flexbox;
  display: flex;
  -webkit-box-align: center;
      -ms-flex-align: center;
          align-items: center;
}
.carousel-wrapper .slide-number {
  position: absolute;
  top: 1rem;
  left: 1rem;
  color: #fff;
  z-index: 2;
}
.carousel-wrapper .carousel-item {
  position: absolute;
  width: 100%;
  height: 100%;
  opacity: 0;
  overflow: hidden;
  -webkit-box-shadow: 0px 0px 5px #1b070f, -2px 2px 5px #1b070f;
          box-shadow: 0px 0px 5px #1b070f, -2px 2px 5px #1b070f;
  border-radius: 12px;
  -webkit-transition: all 300ms;
  transition: all 300ms;
  z-index: 1;
}
.carousel-wrapper .carousel-item img {
  width: 100%;
  height: 100%;
  -o-object-fit: cover;
     object-fit: cover;
  -o-object-position: center;
     object-position: center;
}
.carousel-wrapper .carousel-item[data-active-slide] {
  opacity: 1;
  -webkit-transition: all 300ms;
  transition: all 300ms;
}
.carousel-wrapper .carousel-arrow {
  position: absolute;
  background: none;
  font-size: 40px;
  border: 0;
  z-index: 2;
  color: #fff;
  cursor: pointer;
  padding: 0.25rem 1rem;
}
.carousel-wrapper .carousel-arrow[disabled], .carousel-wrapper .carousel-arrow:disabled {
  background-color: rgba(255, 255, 255, 0.1);
  color: rgba(255, 255, 255, 0.3);
  cursor: not-allowed;
}
.carousel-wrapper .carousel-arrow[disabled]:hover, .carousel-wrapper .carousel-arrow:disabled:hover {
  background: none;
}
.carousel-wrapper .carousel-arrow:hover {
  background-color: rgba(255, 255, 255, 0.1);
}
.carousel-wrapper .next {
  right: 0;
}
.carousel-wrapper .prev {
  left: 0;
}
.carousel-dots {
  position: absolute;
  width: 100%;
  bottom: 1rem;
  display: -webkit-box;
  display: -ms-flexbox;
  display: flex;
  -webkit-box-align: center;
      -ms-flex-align: center;
          align-items: center;
  -webkit-box-pack: center;
      -ms-flex-pack: center;
          justify-content: center;
  gap: 6px;
  z-index: 2;
}
.carousel-dots .dots {
  background-color: rgba(0, 0, 0, 0.4);
  padding: 4px;
  border: 1px solid #fff;
  border-radius: 50%;
  cursor: pointer;
}
.carousel-dots .dots[data-active-dot] {
  background-color: #fff;
}
3. The main JavaScript.
const carousel = document.querySelector('[js-carousel-wrapper]');
const arrows = document.querySelectorAll('[data-carousel-arrows]');
const carouselDots = document.querySelectorAll('[js-data-dots]');
const slideNumber = document.querySelector('[js-slide-number-text]');
let slideIndex = 0;
// add current slide number on the top
function addCurrentSlideNumber(slide, numberText) {
    const lengthOfSlide = slide.length;
    numberText.textContent = `${slideIndex + 1} / ${lengthOfSlide}`;
}
// function to add active slide attribute
function activateSlide (slides) {
    slides.forEach(slide => {
        slide.removeAttribute('data-active-slide');
    });
    slides[slideIndex].setAttribute('data-active-slide', true);
}
// function to add active dots attribute
function activateDots(dots) {
    dots.forEach(dot => {
        dot.removeAttribute('data-active-dot')
    })
    dots[slideIndex].setAttribute('data-active-dot', true);
}
// Below function will add or remove disabled attribute to the arrows
function disableArrows(slides, nextBtn, prevBtn) {
    let nextBtnBooleanValue = slideIndex >= slides.length - 1 ? true : false;
    let prevBtnBooleanValue = slideIndex <= 0 ? true : false;
    nextBtnBooleanValue ? nextBtn.setAttribute('disabled', 'true') : nextBtn.removeAttribute('disabled');
    prevBtnBooleanValue ? prevBtn.setAttribute('disabled', 'true') : prevBtn.removeAttribute('disabled');
}
// helper function to hide or show slides
function showslides(carouselWrapper, dots) {
    const slides = carouselWrapper.querySelectorAll('[js-carousel-item]');
    // Below commented code need to added only if we no need to disabled arrow once they reached to end
    // if (slideIndex > slides.length - 1) slideIndex = 0;
    // if (slideIndex < 0) slideIndex = slides.length - 1;
    // Below code need to added only if we need to disable the arrows once they reached to end
    const nextBtn = carouselWrapper.querySelector('.next');
    const prevBtn = carouselWrapper.querySelector('.prev');
    disableArrows(slides, nextBtn, prevBtn)
    activateSlide (slides);
    activateDots(dots);
    addCurrentSlideNumber(slides, slideNumber);
}
// function to navigate next or prev slide
function nextOrPrevSlide (dir) {
    if (dir === 'next') {
        slideIndex++;
        showslides(carousel, carouselDots);
    } else {
        slideIndex--;
        showslides(carousel, carouselDots);
    }
}
// function to activate current clicked dot vs current slide
function currentSlide(n) {
    slideIndex = n - 1;
    showslides(carousel, carouselDots);
}
// function to handle arrows click event
function handleArrowClickEvent(arrowBtn) {
    arrowBtn.forEach(arrow => {
        arrow.addEventListener('click', () => {
            if (arrow.dataset.dir === 'next') {
                nextOrPrevSlide('next');
            } else {
                nextOrPrevSlide('prev')
            }
        })
    });
}
// function to handle dots click event
function handleDotsClickEvent(dots) {
    dots.forEach(dot => {
        dot.addEventListener('click', () => {
            currentSlide(parseInt(dot.dataset.dotsIndex))
        })
    })
}
// handle all the click events
function handleClickEvents() {
    handleDotsClickEvent(carouselDots);
    handleArrowClickEvent(arrows);
    // We need to call this function here only if we need to disable the prev arrow on-load
    showslides(carousel, carouselDots);
}
handleClickEvents();
See Also:
 Touch-Ready, High-Performance Vanilla JS Slider – Pagiflow
 Create Modern Mobile-friendly Carousels With Slickless.js
 Lightweight Vanilla JS Carousel with Touch Support – Driftbox
 Lightweight Bootstrap 5 Card Slider – AvalynxCardSlider
 Infinite Scrolling Carousel with Momentum Physics – Grab-n-Drag Infinite Carousel
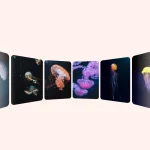 Lightweight Pure CSS 3D Carousel with Fade in/out Effects
 Tiny Touch Carousel Web Component for Modern Apps – Pure Swipe Slider
 Fast, Extensible, Touch-enabled Carousel & Slider JS Library – Smooothy