


The Rabbit Lightweight Modal allows you to create responsive, customizable, stacked modal windows with one JS call.
The modal library works with pure JavaScript with zero dependencies. It supports multiple modal sizes/types, flexible positioning, countdown timers, sliding sidebars, AJAX content loading, and custom button actions.
All modal content accepts HTML markup and generates dynamically without writing additional HTML or CSS.
Use Cases:
- User Notifications: Display important messages or alerts without disrupting the user’s workflow. The center-positioned modal is ideal here.
- Form Submission: Present forms for login, registration, or data input directly within a modal. Choose a size that fits your form content, from small to large.
- Image Galleries: Showcase images in an elegant way. Use the cover-page size for an immersive experience.
- Navigation Menus: Implement sidebar menus for site navigation or application settings. The left and right sidebar options provide a clean and organized solution.
- Multi-Step Processes: Guide users through a series of steps by stacking modals on top of each other. This keeps the user focused on the current task.
- Detailed Information Display: Show supplementary information or details related to an element on the page. Position the modal near the relevant element using options like top-right or bottom-left.
See It In Action:
How to use it:
1. Load Rabbit Lightweight Modal’s CSS and JavaScript files in your HTML document:
<link rel="stylesheet" href="rabbit-modal.css" />
<script src="rabbit-modal.js"></script>
2. Instantiate a new RabbitModal instance and define the title/content for your modal:
const myModal = new RabbitModal({
  title: "Modal Title",
  content: "Modal Content",
});
2. Show/hide/destroy the modal window when needed:
myModal.show();
myModal.hide();
myModal.destroy();
3. Control the modal’s dimensions using the size option: small, default, large, xlarge, cover-page.
const myModal = new RabbitModal({
  title: "Modal Title",
  content: "Modal Content",
  size: "small",
});
4. Determine the modal’s screen position with the position option:center, top, right, bottom, left, top-left, top-right, bottom-left, bottom-right.
const myModal = new RabbitModal({
  title: "Modal Title",
  content: "Modal Content",
  position: "top-right",
});
5. You can also use the position option to create full-height sidebar panels.
const myModal = new RabbitModal({
  title: "Modal Title",
  content: "<div class='sidebar-menu'>sidebar content here</div>",
  position: "left-sidebar", // or right-sidebar
});
6. Add custom action buttons with the buttons option, and enable modal stacking using the stackable property:
const myModal = new RabbitModal({
  title: "Modal Title",
  content: "Modal Content",
  stackable: true,
  buttons: [
    {
      key: "openSecond", // unique ID
      type: "primary", // primary, secondary, danger, success
      text: "Open Another",
      callback: () => {
        const modal2 = new RabbitModal({
          title: "Second Modal",
          content: "This is the second modal"
        });
        modal2.show();
      }
    },
    {
      // more buttons here
    }
  ]
});
7. Control the overlay’s visibility and color with the overlay and overlayColor options:
const myModal = new RabbitModal({
  title: "Modal Title",
  content: "Modal Content",
  overlay: true,
  overlayColor: "rgba(0, 0, 0, 0.6)",
});
8. Determine whether to show modal headers:
const myModal = new RabbitModal({
  title: "Modal Title",
  content: "Modal Content",
  showHeaderClose: true,
});
9. Customize the countdown timer.
const myModal = new RabbitModal({
  title: "Modal Title",
  content: "Modal Content",
  timer: {
    enabled: false,
    duration: 3000,
    progress: false,
    closeOnTimeup: true,
    onTimeup: null
  }
});
10. Set the type of the modal window: success, error, warning, info.
const myModal = new RabbitModal({
  title: "Modal Title",
  content: "Modal Content",
  type: null,
});
11. Load content dynamically via AJAX:
const myModal = new RabbitModal({
  title: "Modal Title",
  ajax: {
    url: 'https://api.example.com/data',
    method: 'GET',
    headers: {
      'Authorization': 'Bearer token'
    },
    data: { id: 123 },
    contentType: 'json', // json, html, text)
    delay: 1000,
    timeout: 30000,
    retry: {
      enabled: true,
      limit: 3,
      delay: 1000
    },
    credentials: 'same-origin',
    // Callbacks with content element access
    onStart: (modal, content) => {
      console.log('Request starting...');
    },
    onSuccess: (modal, data, content) => {
      content.innerHTML = `<pre>${JSON.stringify(data, null, 2)}</pre>`;
    },
    onError: (modal, error, content) => {
      content.innerHTML = `<div class="error">${error.message}</div>`;
    },
    onComplete: (modal, content) => {
      console.log('Request completed');
    }
});
12. Configure how the modal closes using closeOnBackdrop and closeOnEscape:
const myModal = new RabbitModal({
  title: "Modal Title",
  content: "Modal Content",
  closeOnBackdrop: true,
  closeOnEscape: true,
});
Changelog:
v1.2.0 (01/03/2025)
- Updates & Fixes
v1.1.1 (12/31/2024)
- Updates & Fixes
See Also:
 Lightweight Pure JavaScript Date Picker library – DatePickerX
 Build Minimal Accessible Web Designs with Lissom.CSS
 Create A Simple Event Calendar With JavaScript – Caleandar.js
 Inject Partial HTML Updates Without Refreshing The Whole Page – htmz
 Lightweight Masonry-like Grid Layout Library – Bricklayer
 Custom Hex Color Picker In Vanilla JavaScript
 Canvas Based Clock JavaScript Library – CanvasClock
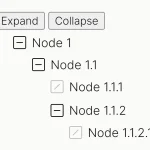 Interactive Tree Structure for Hierarchical Data – Plain Tree