


Just another pure CSS side menu where you can expand sub menu items on mouse hover.
How to use it:
Create a hidden checkbox to control the menu position. When it is checked the menu slides in.
<input type="checkbox" id="menu-button">
Create a label linked to the hidden checkbox.
<label for="menu-button" class="menu-button--label">▤</label>
Create a side menu with the following html structure.
<div class="menu-wrap">
  <div class="side-menu">
    <ul class="side-menu--list">

        <li>
            <a class="subset">Company</a>
            <a href="">Mission</a>
            <a href="">People</a>
            <a href="">Social Responsibility</a>
        </li>
        <li>
            <a class="subset" href="">Products</a>
            <a href="">Solar panels</a>
            <a href="">Electronics</a>
            <a href="">Utilizers</a>
        </li>
        <li>
            <a class="subset" href="">Contacts</a>
            <a href="">Staff</a>
            <a href="">Contact</a>
            <a href="">Media</a>
        </li>
    </ul>
  </div>
</div>
The core CSS / CSS3 rules for the expanding side menu.
/*We are fixing a menu and pulling them out of the screen by negative 'left'*/

.side-menu {
  padding: 0;
  margin: 0;
  font-size: 0;
  position: fixed;
  left: -120px;
  top: 100px;
  opacity: .95;
  overflow: hidden;
  -webkit-transition: all .3s ease-in-out;
  transition: all .3s ease-in-out;
}
/*We need to hide the default input box*/

#menu-button { display: none; }
/*if checkbox is checked next sibling's .side menu child slides in*/

#menu-button:checked + .menu-wrap .side-menu { left: 0px; }
/*this is the label for the checkbox which act as a button for our menu*/

.menu-button--label {
  color: black;
  position: fixed;
  top: 50px;
  left: 10px;
  font-size: 3rem;
  text-align: center;
  line-height: 0;
  cursor: pointer;
  -webkit-transition: all 1s;
  transition: all 1s;
}
/*Fancy rotation effect for our menu button. It rotates back when mouse leaves it */

.menu-button--label:hover {
  -webkit-transform: rotateY(180deg);
  transform: rotateY(180deg);
  -webkit-transition: all 1s;
  transition: all 1s;
}
/*We are giving the li item a shorter width to activate 'pop-out' effect when you hover*/

.side-menu--list li {
  font-size: 0;
  width: 110px;
}
.side-menu--list a {
  color: #fff;
  display: block;
  text-decoration: none;
  height: 2rem;
  line-height: 2rem;
  background: #333;
  padding-left: 1rem;
  width: 180px;
  font-size: 1.2rem;
}
.side-menu--list {
  list-style: none;
  padding-left: 0;
}
/*.subset is a sub-menu that we are styling to stand out a bit*/

.side-menu--list li a.subset {
  font-size: 1.4rem;
  height: 2.2rem;
  line-height: 2.2rem;
 padding-left: .5rem;
  background: #222;
}
/*Applying overflow:hidden to get rid of the cluttering when the height is minimized*/

.side-menu--list li {
  height: 2.2rem;
  overflow: hidden;
  -webkit-transition: all .4s ease-in-out;
  transition: all .4s ease-in-out;
}
/*when you hover a li it expands to show all the menu links(and expands itself only)*/

.side-menu--list li:hover {
  height: 8.2rem;
  -webkit-transition: all .4s ease-in-out;
  transition: all .4s ease-in-out;
  cursor: pointer;
  width: 180px;
}
/*We are skipping a sub-menu link and applying transformation to the follow-ups*/

.side-menu--list li a:not(:first-child):hover {
  cursor: pointer;
  background-color: #fff;
  color: #333;
  -webkit-transition: all .3s ease-in-out;
  transition: all .3s ease-in-out;
  -webkit-transform: translateX(10px);
  transform: translateX(10px);
}
See Also:
 Create Mobile-First Side Menus with SlideReveal.js Library
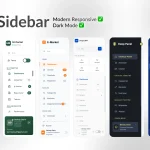 6 Modern Responsive Sidebar Navigation Components for TailwindCSS
 Simple Sidebar Hamburger Menu In CSS
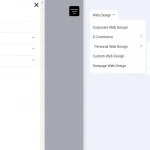 Responsive Multi-level Dropdown Menu With JavaScript And CSS – ozmenu.js
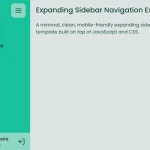 Expanding Sidebar Navigation With JavaScript And CSS
 Responsive Sidebar Navigation With Hamburger Toggle Button
 Off-canvas Accordion Menu With Bootstrap 5
 Responsive Collapsible Side & Tab Navigation In JavaScript/CSS