


| Author: | ebrahim-2030 |
|---|---|
| Views Total: | 0 views |
| Official Page: | Go to website |
| Last Update: | April 21, 2025 |
| License: | MIT |
Preview:

Description:
Vanilla Carousel Slider is a responsive image carousel built with pure JavaScript that requires no external libraries or frameworks.
The carousel slider handles displaying a main image with animated content overlays, while showing upcoming slides as smaller previews off to the side.
It includes automatic playback, manual next/previous controls, subtle text reveal animations, and smooth thumbnail morphing effects.
See It In Action:
How to use it:
1. Build the HTML structure for the carousel slider.
You need a main container (.carousel). Inside that, a .list div holds all your individual .item elements. Each .item represents a slide and should have an inline background-image style. Within each .item, place a .content div containing your text (.title, .name, .des) and buttons (.btn).
Crucially, also include the .arrows div with the .prev and .next buttons, and an empty .timeRunning div directly inside the main .carousel container.
<!-- Main Carousel Container -->
<div class="carousel">
  <!-- Carousel Items Wrapper -->
  <div class="list">
    <!-- Carousel Item 1 -->
    <div class="item" style="background-image: url(1.jpg)">
      <div class="content">
        <div class="title">Image</div>
        <div class="name">One</div>
        <div class="des">
          Description 1
        </div>
        <div class="btn">
          <button>See More</button>
          <button>Subscribe</button>
        </div>
      </div>
    </div>
    <!-- Carousel Item 2 -->
    <div class="item" style="background-image: url(2.jpg)">
      <div class="content">
        <div class="title">Image</div>
        <div class="name">Two</div>
        <div class="des">
          Description 2
        </div>
        <div class="btn">
          <button>See More</button>
          <button>Subscribe</button>
        </div>
      </div>
    </div>
    <!-- More Items Here -->
  </div>
  <!-- End of .list -->
  <!-- Navigation Arrows for Carousel -->
  <div class="arrows">
    <button class="prev"><</button>
    <button class="next">></button>
  </div>
  <!-- Time Running Indicator -->
  <div class="timeRunning"></div>
</div>
<!-- End of .carousel -->
2. Add the following CSS snippets to your stylesheet or webpage. It handles:
- Basic layout (
.carousel,.list,.itempositioning). - Stacking the items using
:nth-childselectors to create the main view and side previews. - Hiding excess items (
:nth-child(n+7)). - Styling and animating the
.contentreveal (@keyframes animate). - Positioning and styling the
.arrows. - The
.timeRunningprogress bar animation (@keyframes runningTime). - Basic responsiveness via media queries.
/* --- Carousel --- */
.carousel {
  width: 100vw;
  height: 100vh;
  margin-top: -50px;
  overflow: hidden;
  position: relative;
}
.carousel .list .item {
  width: 180px;
  height: 250px;
  position: absolute;
  top: 80%;
  transform: translateY(-70%);
  left: 70%;
  border-radius: 20px;
  box-shadow: 0 25px 50px rgba(0, 0, 0, 0.3);
  background-position: center;
  background-size: cover;
  z-index: 100;
  transition: 1s;
}
/* Main items */
.carousel .list .item:nth-child(1),
.carousel .list .item:nth-child(2) {
  top: 0;
  left: 0;
  width: 100%;
  height: 100%;
  transform: none;
  border-radius: 0;
}
/* Extra items on right */
.carousel .list .item:nth-child(3) { left: 67%; }
.carousel .list .item:nth-child(4) { left: calc(67% + 200px); }
.carousel .list .item:nth-child(5) { left: calc(67% + 400px); }
.carousel .list .item:nth-child(6) { left: calc(67% + 600px); }
/* Hide items after 6th */
.carousel .list .item:nth-child(n+7) {
  left: calc(67% + 800px);
  opacity: 0;
}
/* --- Content inside active item --- */
.list .item .content {
  position: absolute;
  top: 50%;
  left: 100px;
  transform: translateY(-50%);
  width: 400px;
  text-align: left;
  color: #fff;
  display: none;
}
.list .item:nth-child(2) .content {
  display: block;
}
/* Text animations */
.content .title,
.content .name,
.content .des,
.content .btn {
  opacity: 0;
  animation: animate 1s ease-in-out 1 forwards;
}
.content .title {
  font-size: 100px;
  color: #14ff72cb;
  font-weight: bold;
  animation-delay: 0.3s;
}
.content .name {
  font-size: 100px;
  font-weight: bold;
  text-shadow: 3px 4px 4px rgba(255,255,255,0.8);
  animation-delay: 0.6s;
}
.content .des {
  font-size: 18px;
  margin: 10px 0 20px 5px;
  animation-delay: 0.9s;
}
.content .btn {
  margin-left: 5px;
  animation-delay: 1.2s;
}
.content .btn button {
  padding: 10px 20px;
  font-size: 16px;
  border: 2px solid #fff;
  background: none;
  cursor: pointer;
}
.content .btn button:nth-child(1) {
  margin-right: 15px;
  color: #fff;
}
.content .btn button:nth-child(2) {
  color: #14ff72cb;
  transition: 0.3s;
}
.content .btn button:nth-child(2):hover {
  background: #14ff72cb;
  color: #fff;
  border-color: #14ff72cb;
}
/* Animation keyframe */
@keyframes animate {
  from {
    opacity: 0;
    transform: translateY(100px);
    filter: blur(33px);
  }
  to {
    opacity: 1;
    transform: translateY(0);
    filter: blur(0);
  }
}
/* --- Arrows --- */
.arrows {
  position: absolute;
  top: 80%;
  right: 52%;
  display: flex;
  gap: 10px;
  width: 300px;
  max-width: 30%;
  align-items: center;
  z-index: 100;
}
.arrows button {
  width: 50px;
  height: 50px;
  border-radius: 50%;
  background: #14ff72cb;
  color: #fff;
  font-weight: bold;
  font-size: 16px;
  border: none;
  cursor: pointer;
  transition: 0.5s;
}
.arrows button:hover {
  background: #fff;
  color: #000;
}
/* --- Progress bar --- */
.carousel .timeRunning {
  position: absolute;
  top: 0;
  left: 0;
  height: 4px;
  width: 0%;
  background: #14ff72cb;
  animation: runningTime 7s linear forwards;
}
@keyframes runningTime {
  from { width: 0%; }
  to { width: 100%; }
}
/* --- Responsive --- */
@media screen and (max-width: 999px) {
  .list .item .content { left: 50px; }
  .content .title, .content .name { font-size: 70px; }
  .content .des { font-size: 16px; }
}
@media screen and (max-width: 690px) {
  .list .item .content { top: 40%; }
  .content .title, .content .name { font-size: 45px; }
  .content .btn button {
    padding: 10px 15px;
    font-size: 14px;
  }
}
3. Add the JavaScript code that powers the carousel:
// Select DOM elements
const nextBtn = document.querySelector('.next');
const prevBtn = document.querySelector('.prev');
const carousel = document.querySelector('.carousel');
const list = document.querySelector('.list');
const items = document.querySelectorAll('.item');
const runningTime = document.querySelector('.carousel .timeRunning');
// Timing configs
const timeRunning = 3000;
const timeAutoNext = 5000;
let runTimeout;
let autoNext = setTimeout(() => {
nextBtn.click();
}, timeAutoNext);
// Next/prev button click events
nextBtn.onclick = () => showSlider('next');
prevBtn.onclick = () => showSlider('prev');
// Reset progress bar animation
function resetTimeAnimation() {
runningTime.style.animation = 'none';
runningTime.offsetHeight; // trigger reflow
runningTime.style.animation = 'runningTime 7s linear 1 forwards';
}
// Handle carousel slide logic
function showSlider(direction) {
const sliderItems = list.querySelectorAll('.carousel .list .item');
if (direction === 'next') {
list.appendChild(sliderItems[0]); // move first to last
carousel.classList.add('next');
} else {
list.prepend(sliderItems[sliderItems.length - 1]); // move last to first
carousel.classList.add('prev');
}
// Remove animation class after slide transition
clearTimeout(runTimeout);
runTimeout = setTimeout(() => {
carousel.classList.remove('next');
carousel.classList.remove('prev');
}, timeRunning);
// Reset auto next timer
clearTimeout(autoNext);
autoNext = setTimeout(() => {
nextBtn.click();
}, timeAutoNext);
resetTimeAnimation();
}
// Start animation on load
resetTimeAnimation();Best Practices:
Accessibility: This basic implementation lacks robust accessibility features. You need to add ARIA attributes (aria-live, aria-roledescription, roles, etc.) and keyboard navigation support for a production site.
Item Count: The CSS is hardcoded for a specific number of visible preview items (:nth-child(n+7) hides items). If you have fewer than 6 items total, the layout might look odd or empty. You’d need to adjust the CSS :nth-child rules based on your item count if it differs significantly. I’ve noticed that with fewer items, the visual effect of the side-stack isn’t as pronounced.
See Also:
 CSS-only Infinite Card Carousel with Smooth Gradient Transitions
 Draggable & Touch-friendly Carousel In Vanilla JavaScript – embla-carousel
 Vanilla JavaScript Responsive Image Carousel: Lightweight & Performant
 Responsive JavaScript Slider Carousel with Custom Cursor Controls
 Infinite Carousel Slider With Autoplay
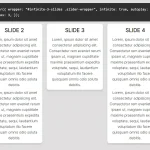 Responsive Adaptive Slider/Carousel with Vanilla JS – No jQ Slider
 Brand Logo Carousel with Fading Effect and Infinite Looping
 Responsive Carousel With Gradient Background