


A tiny script to create a customizable, accessible, filterable select input from plain input and HTML list elements.
How to use it:
1. Create a regular input field to accept the values and a list of predefined options as follows:
<div class="custom-select" id="myCustomSelect">
<input type="text" id="custom-select-input" class="select-css" aria-describedby="custom-select-info">
<span id="custom-select-info" class="hidden-visually">Arrow down for options or start typing to filter.</span>
<span class="custom-select-icons">
<svg version="1.1" xmlns="http://www.w3.org/2000/svg" xmlns:xlink="http://www.w3.org/1999/xlink" width="16" height="16" viewBox="0 0 16 16" focusable="false" aria-hidden="true" id="icon-circle-down" class="icon" role="img">
<path d="M16 8c0-4.418-3.582-8-8-8s-8 3.582-8 8 3.582 8 8 8 8-3.582 8-8zM1.5 8c0-3.59 2.91-6.5 6.5-6.5s6.5 2.91 6.5 6.5-2.91 6.5-6.5 6.5-6.5-2.91-6.5-6.5z"></path>
<path d="M4.957 5.543l-1.414 1.414 4.457 4.457 4.457-4.457-1.414-1.414-3.043 3.043z"></path>
</svg>
<svg version="1.1" xmlns="http://www.w3.org/2000/svg" xmlns:xlink="http://www.w3.org/1999/xlink" width="16" height="16" viewBox="0 0 16 16" focusable="false" aria-hidden="true" id="icon-circle-up" class="icon hidden-all" role="img">
<path d="M0 8c0 4.418 3.582 8 8 8s8-3.582 8-8-3.582-8-8-8-8 3.582-8 8zM14.5 8c0 3.59-2.91 6.5-6.5 6.5s-6.5-2.91-6.5-6.5 2.91-6.5 6.5-6.5 6.5 2.91 6.5 6.5z"></path>
<path d="M11.043 10.457l1.414-1.414-4.457-4.457-4.457 4.457 1.414 1.414 3.043-3.043z"></path>
</svg>
</span>
<ul class="custom-select-options hidden-all" id="custom-select-list">
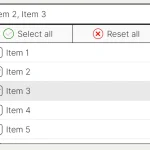
<li><strong>User</strong><br>Logged in Users can read locked content and update their profile.</li>
<li><strong>Author</strong><br>Authors can create, edit and delete their own posts.</li>
<li><strong>Editor</strong><br>Editors can create, edit and delete all posts by all authors.</li>
<li><strong>Manager</strong><br>Managers have the same permissions as Editors, plus they can create, edit and delete categories, pages and manage comments.</li>
<li><strong>Administrator</strong><br>Administrators have full control over the posts, pages, categories, themes and plugins of the site.</li>
</ul>
</div>2. The CSS to customize the select input.
.select-css {
  display: block;
  font-size: 1em;
  font-family: sans-serif;
  font-weight: 700;
  color: #444;
  line-height: 1.3;
  padding: .6em 1.4em .5em .8em;
  width: 100%;
  max-width: 100%;
  box-sizing: border-box;
  margin: 0;
  border: 1px solid #aaa;
  box-shadow: 0 1px 0 1px rgba(0,0,0,.04);
  border-radius: .25em;
  -moz-appearance: none;
  -webkit-appearance: none;
  appearance: none;
  background-color: #fff;
  position: relative;
  z-index: 10;
}
.select-css::-ms-expand {
  display: none;
}
.select-css:hover {
  border-color: #888;
}
.select-css:focus {
  border: 2px dashed blue;
  color: #222;
  outline: none;
}
.custom-select-icons {
  position: absolute;
  top: 0.5em;
  right: 0.5em;
  z-index: 20;
  border: 1px solid white;
  background: transparent;
}
.custom-select-options {
  border: 1px solid #aaa;
  border-radius: 0 0 0.25em .25em;
  line-height: 1.5;
  margin: 0;
  margin-top: -0.5em;
  padding: 0;
  list-style-type: none;
  font-weight:normal;
  cursor: pointer;
  z-index: 2;
  position: absolute;
  width: calc(100% - 1px);
  background-color: #ffffff;
}
.custom-select-options li {
  padding: 1em;
}
.custom-select-options li:hover {
  background: blue;
  color: #fff;
  border: 1px solid blue;
  border-width: 0 0 0 1px;
}
.custom-select-options li:focus {
  border: 1px solid blue;
}
.icon {
  fill: ButtonText;
  pointer-events: none;
}
@media screen and (-ms-high-contrast: active) {
  .icon {
    fill: ButtonText;
  }
}
.hidden-all {
  display: none;
}
.hidden-visually {
  position: absolute;
  width: 1px;
  height: 1px;
  padding: 0;
  overflow: hidden;
  clip: rect(0,0,0,0);
  white-space: nowrap;
  -webkit-clip-path: inset(50%);
  clip-path: inset(50%);
  border: 0;
}
3. Load the main script at the end of the document. That’s it.
<script src="index.js"></script>
See Also:
 Feature-rich Custom Select JavaScript Library – SimpSelect
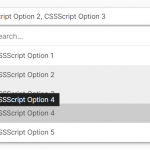 High Performance Select Box with Virtual Scroll (Vanilla JS) – Virtual Select
 Tagging & Searchable Dropdown with Multi-Select – Searchdown.js
 Bootstrap 5 Select Dropdown Enhancer – AvalynxSelect
 Fast Touch-Friendly Picker Library for JavaScript & React – Quickpick UI
 Advanced Draggable & Selectable Library – DragSelect
 Powerful Single & Multiple Select Library – tail.select
 Enhanced Dropdown Select In Pure JavaScript – LC-select