


DatPayment is a lightweight JS library used to create an interactive payment form that enables the user to type credit card information in a convenient way. Requires the familiar Stripe.js library.
Features:
- Auto swaps credit card image based on your input.
- Formats credit card numbers.
- Validates the credit card numbers and expiration dates.
How to use it:
Place the core style sheet DatPayment.css in the head section of the html page.
<link rel="stylesheet" href="DatPayment.css">
<form action="/" method="POST" id="payment-form" class="datpayment-form">
  <div class="dpf-title">
      Payment by credit card
      <div class="accepted-cards-logo"></div>
  </div>
  <div class="dpf-card-placeholder"></div>
  <div class="dpf-input-container">
      <div class="dpf-input-row">
          <label class="dpf-input-label">Credit Card Number</label>
          <div class="dpf-input-container with-icon">
              <span class="dpf-input-icon"><i class="fa fa-credit-card" aria-hidden="true"></i></span>
              <input type="text" class="dpf-input" size="20" data-type="number">
          </div>
      </div>
      <div class="dpf-input-row">
          <div class="dpf-input-column">
              <input type="hidden" size="2" data-type="exp_month" placeholder="MM">
              <input type="hidden" size="2" data-type="exp_year" placeholder="YY">
              <label class="dpf-input-label">Expiration Date</label>
              <div class="dpf-input-container">
                  <input type="text" class="dpf-input" data-type="expiry">
              </div>
          </div>
          <div class="dpf-input-column">
              <label class="dpf-input-label">Code</label>
              <div class="dpf-input-container">
                  <input type="text" class="dpf-input" size="4" data-type="cvc">
              </div>
          </div>
      </div>
      <div class="dpf-input-row">
          <label class="dpf-input-label">Full Name</label>
          <div class="dpf-input-container">
              <input type="text" size="4" class="dpf-input" data-type="name">
          </div>
      </div>
      <button type="submit" class="dpf-submit">
              <span class="btn-active-state">
                  Submit
              </span>
              <span class="btn-loading-state">
                  <i class="fa fa-refresh "></i>
              </span>
      </button>
  </div>
</form>
Load the necessary Stripe.js in the html page.
<script src="https://js.stripe.com/v2/"></script>
Load the DatPayment.js at the bottom of the page.
<script src="DatPayment.js"></script>
Active the payment form.
var payment_form = new DatPayment({
  form_selector: '#payment-form',
  card_container_selector: '.dpf-card-placeholder',
  number_selector: '.dpf-input[data-type="number"]',
  date_selector: '.dpf-input[data-type="expiry"]',
  cvc_selector: '.dpf-input[data-type="cvc"]',
  name_selector: '.dpf-input[data-type="name"]',
  submit_button_selector: '.dpf-submit',
  placeholders: {
      number: '•••• •••• •••• ••••',
      expiry: '••/••',
      cvc: '•••',
      name: 'DUPONT'
  },
  validators: {
      number: function(number){
          return Stripe.card.validateCardNumber(number);
      },
      expiry: function(expiry){
          var expiry = expiry.split(' / ');
          return Stripe.card.validateExpiry(expiry[0]||0,expiry[1]||0);
      },
      cvc: function(cvc){
          return Stripe.card.validateCVC(cvc);
      },
      name: function(value){
          return value.length > 0;
      }
  }
});
var demo_log_div = document.getElementById("demo-log");
payment_form.form.addEventListener('payment_form:submit',function(e){
  var form_data = e.detail;
  payment_form.unlockForm();
  demo_log_div.innerHTML += "<br>"+JSON.stringify(form_data);
});
payment_form.form.addEventListener('payment_form:field_validation_success',function(e){
  var input = e.detail;
  demo_log_div.innerHTML += "<br>field_validation_success:"+input.getAttribute("data-type");
});
payment_form.form.addEventListener('payment_form:field_validation_failed',function(e){
  var input = e.detail;
  demo_log_div.innerHTML += "<br>field_validation_failed:"+input.getAttribute("data-type");
});
All default options.
formatting: true,
formSelectors: {
  numberInput: 'input[name="number"]',
  expiryInput: 'input[name="expiry"]',
  cvcInput: 'input[name="cvc"]',
  nameInput: 'input[name="name"]'
},
cardSelectors: {
  cardContainer: '.jp-card-container',
  card: '.jp-card',
  numberDisplay: '.jp-card-number',
  expiryDisplay: '.jp-card-expiry',
  cvcDisplay: '.jp-card-cvc',
  nameDisplay: '.jp-card-name'
},
messages: {
  validDate: 'valid\nthru',
  monthYear: 'month/year'
},
placeholders: {
  number: '•••• •••• •••• ••••',
  cvc: '•••',
  expiry: '••/••',
  name: 'Full Name'
},
classes: {
  valid: 'jp-card-valid',
  invalid: 'jp-card-invalid'
},
debug: false
Changelog:
09/17/2018
- fix : expiry date not valid when placeholder autocomplete is not used (not compatible browsers)
See Also:
 Validating Credit Card Numbers With Pure JavaScript – credicard.js
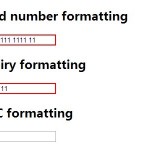 Validating and Formatting Credit Card Inputs with Payment.js
 Enhance Your Online Store’s Checkout Process With CardJs
 Validate & Format Credit Card Numbers Using Regex – cc-form-validator.js
 Minimalist Credit Card Number Input With Vanilla JavaScript
 Glassmorphism Debit/Credit Card In Pure CSS
 Fancy Animated Checkout Experience
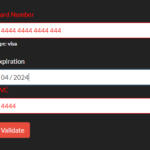 Payment (Credit Card) Form Generator With Input Validation – payform
How can I make it submit data?