| Author: | brunnopleffken |
|---|---|
| Views Total: | 30,915 views |
| Official Page: | Go to website |
| Last Update: | February 7, 2025 |
| License: | MIT |
Preview:

Description:
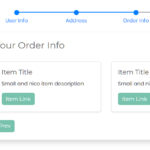
Enchanter is a simple form wizard plugin for Bootstrap 5 that lets you convert an HTML form into a step-by-step wizard interface.
How to use it:
1. To get started, make sure you have the latest Bootstrap 5 framework loaded in the page.
<link rel="stylesheet" href="/path/to/cdn/bootstrap.min.css" />
<script src="/path/to/cdn/bootstrap.min.js"></script>
2. Add steps to the form wizard using Bootstrap’s tabs component:
<nav>
  <div class="nav nav-pills nav-fill" id="nav-tab" role="tablist">
    <a class="nav-link active" id="step1-tab" data-toggle="tab" href="#step1">Step 1</a>
    <a class="nav-link" id="step2-tab" data-toggle="tab" href="#step2">Step 2</a>
    <a class="nav-link" id="step3-tab" data-toggle="tab" href="#step3">Step 3</a>
  </div>
</nav>
<div class="tab-content py-4" id="nav-tabContent">
  <div class="tab-pane fade show active" id="step1">
    <h4>Step 1</h4>
    <div class="mb-3">
      <label for="first_name">Required field 1</label>
      <input type="text" class="form-control" id="first_name" required>
    </div>
    <div class="mb-3">
      <label for="first_name">Required field 2</label>
      <input type="text" class="form-control" id="first_name" required>
    </div>
    <div class="mb-3">
      <label for="first_name">Optional field</label>
      <input type="text" class="form-control" id="first_name">
    </div>
  </div>
  <div class="tab-pane fade" id="step2">
    <h4>Step 2</h4>
    <div class="mb-3">
      <label for="first_name">Required field 1</label>
      <input type="text" class="form-control" id="first_name" required>
    </div>
    <div class="mb-3">
      <label for="first_name">Optional field</label>
      <input type="text" class="form-control" id="first_name">
    </div>
    <div class="mb-3">
      <label for="first_name">Required field 2</label>
      <textarea rows="5" class="form-control" required></textarea>
    </div>
  </div>
  <div class="tab-pane fade" id="step3">
    <h4>Step 3</h4>
    <div class="mb-3">
      <label for="first_name">Required field 1</label>
      <input type="text" class="form-control-plaintext" value="Lorem ipsum dolor sit amet" id="first_name">
    </div>
    <div class="mb-3">
      <label for="first_name">Optional field</label>
      <input type="text" class="form-control-plaintext" value="Lorem ipsum dolor sit amet" id="first_name">
    </div>
    <div class="mb-3">
      <label for="first_name">Required field 2</label>
      <input type="text" class="form-control-plaintext" value="Lorem ipsum dolor sit amet" id="first_name">
    </div>
  </div>
</div>
3. Create prev/next navigation buttons for the form wizard.
<div class="row justify-content-between">
  <div class="col-auto"><button type="button" class="btn btn-secondary" data-enchanter="previous">Previous</button></div>
  <div class="col-auto">
    <button type="button" class="btn btn-primary" data-enchanter="next">Next</button>
    <button type="submit" class="btn btn-primary" data-enchanter="finish">Finish</button>
  </div>
</div>
4. Load the main JavaScript enchanter.js from the dist folder.
<script src="./dist/enchanter.js"></script>
5. Initialize the form wizard by calling the function Enchanter on the HTML form.
const wizard = new Enchanter('form');6. Callback functions.
const wizard = new Enchanter('form', {}, {
  onNext: () => {
    // do something
  },
  onPrevious: () => {
    // do something
  },
  onFinish: () => {
    // do something
  },
});
Changelog:
02/07/2025
- refactor: improved validations
v1.2.1 (01/30/2025)
- Implement DOM element caching for better performance
- Throw Error if container element doesn’t exist
01/29/2025
- feat: throw Error if container element doesn’t exist
12/07/2023
- v1.1.0
11/28/2022
- v1.0.0
04/05/2022
- add onFinish callback
v0.2 (09/29/2021)
- Fix previous button not working
11/11/2020
- Change interface names


