


This lightweight card carousel transforms static content cards into an interactive, coverflow-style slider with next/prev navigation controls.
It lets users navigate through a series of content cards, bringing one into focus while others blur out with a 3D perspective effect.
Features
- Coverflow Effect: Uses CSS
transform(translate, scale, rotateY, perspective) for the characteristic 3D stacking. - Button Navigation: Simple next/previous buttons trigger card transitions.
- Smooth Transitions: Leverages CSS
transitionfor animating property changes. - DOM Manipulation: JavaScript dynamically updates inline styles on card elements.
- Simple Structure: Relies on basic HTML (
divs andbuttons) and CSS positioning.
How to use it:
1. You need a container div (e.g., .slider) to hold your items and navigation buttons. Each card is an element (e.g., div.item), and you’ll need two buttons (#next, #prev).
<div class="slider">
  <div class="item">
    <h1>Item 1</h1>
    Jupiter protects Earth - its gravity acts like a cosmic shield, deflecting comets and asteroids.🌠
  </div>
  <div class="item">
    <h1>Item 2</h1>
    Stars "beat" like hearts - they pulsate, expanding and contracting as they burn fuel.⭐
  </div>
  <div class="item">
    <h1>Item 3</h1>
    Galaxies can "eat" each other - the Milky Way is currently consuming the Sagittarius Dwarf Galaxy.🌌
  </div>
  ...
</div>
2. The CSS handles the layout, basic appearance, and crucially, the transition property that enables animation.
.slider {
 position: relative;
 margin-top: 100px;
 width: 100%;
 height: 370px;
 overflow: hidden;
}
.item {
 position: absolute;
 width: 200px;
 height: 320px;
 text-align: justify;
 background-color: #fff;
 border-radius: 10px;
 padding: 20px;
 transition: 0.5s;
 left: calc(50% - 110px);
 top: 0;
}
#next {
 position: absolute;
 right: 50px;
 top: 40%;
}
#prev {
 position: absolute;
 left: 50px;
 top: 40%;
}
#prev,
#next {
 color: #fff;
 background: none;
 border: none;
 font-size: xxx-large;
 font-family: monospace;
 font-weight: bold;
 opacity: 0.5;
 transition: opacity 0.5s;
}
#prev:hover,
#next:hover {
 opacity: 1;
}
3. The JavaScript handles the interactive behavior of the carousel. It positions the cards and manages the transitions when navigation buttons are clicked:
let items = document.querySelectorAll(".slider .item");
let active = 3;
function loadShow() {
  items[active].style.transform = `none`;
  items[active].style.zIndex = 1;
  items[active].style.filter = "none";
  items[active].style.opacity = 1;
  // show after
  let stt = 0;
  for (var i = active + 1; i < items.length; i++) {
    stt++;
    items[i].style.transform = `translateX(${120 * stt}px) scale(${
      1 - 0.2 * stt
    }) perspective(16px) rotateY(-1deg)`;
    items[i].style.zIndex = -stt;
    items[i].style.filter = "blur(5px)";
    items[i].style.opacity = stt > 2 ? 0 : 0.6;
  }
  stt = 0;
  for (var i = active - 1; i >= 0; i--) {
    stt++;
    items[i].style.transform = `translateX(${-120 * stt}px) scale(${
      1 - 0.2 * stt
    }) perspective(16px) rotateY(1deg)`;
    items[i].style.zIndex = -stt;
    items[i].style.filter = "blur(5px)";
    items[i].style.opacity = stt > 2 ? 0 : 0.6;
  }
}
loadShow();
let next = document.getElementById("next");
let prev = document.getElementById("prev");
next.onclick = function () {
  active = active + 1 < items.length ? active + 1 : active;
  loadShow();
};
prev.onclick = function () {
  active = active - 1 >= 0 ? active - 1 : active;
  loadShow();
};
4. You can implement auto-rotation with a simple interval:
// Auto-rotate every 3 seconds
const autoRotate = setInterval(() => {
  active = (active + 1) % items.length;
  loadShow();
}, 3000);
// Stop auto-rotation when user interacts
document.querySelector('.slider').addEventListener('mouseenter', () => {
  clearInterval(autoRotate);
});
5. You can also extend the JavaScript to add touch support by tracking touch events. Here’s a simple implementation:
let startX;
let isDragging = false;
document.querySelector('.slider').addEventListener('touchstart', (e) => {
  startX = e.touches[0].clientX;
  isDragging = true;
});
document.querySelector('.slider').addEventListener('touchmove', (e) => {
  if (!isDragging) return;
  const currentX = e.touches[0].clientX;
  const diff = startX - currentX;
  if (Math.abs(diff) > 50) {
    if (diff > 0 && active < items.length - 1) {
      active++;
    } else if (diff < 0 && active > 0) {
      active--;
    }
    loadShow();
    isDragging = false;
  }
});
FAQs
Q: How do I change how many cards are visible on the sides?
A: Modify the opacity check in the loadShow function. The offset > 2 ? 0 : 0.6 part means items more than 2 positions away (offset 3 or higher) become fully transparent. Change the 2 to control the visibility range. You might also need to adjust the loop bounds or CSS if you want more items visible and styled.
Q: Can I add touch/swipe support?
A: Not with this code. You’d need to add JavaScript event listeners for touchstart, touchmove, and touchend, calculate the swipe direction and distance, and then trigger the active index change and loadShow() accordingly. This often involves managing state and preventing conflicts with scrolling.
Q: Why is the initial active index set to 3?
A: In the provided example, there are 9 items (indices 0 through 8). Setting active = 3 places the 4th item (index 3) in the center initially, leaving 3 items to the left and 5 to the right. This might have been chosen to demonstrate the effect with items on both sides. For a perfectly centered start with an odd number of items (e.g., 7 items, indices 0-6), you’d set active to the middle index (3). Adjust based on your item count.
See Also:
 Create Modern Mobile-friendly Carousels With Slickless.js
 Touch-Ready, High-Performance Vanilla JS Slider – Pagiflow
 Lightweight Vanilla JS Carousel with Touch Support – Driftbox
 Lightweight Bootstrap 5 Card Slider – AvalynxCardSlider
 Infinite Scrolling Carousel with Momentum Physics – Grab-n-Drag Infinite Carousel
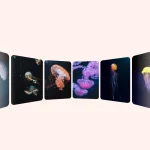 Lightweight Pure CSS 3D Carousel with Fade in/out Effects
 Tiny Touch Carousel Web Component for Modern Apps – Pure Swipe Slider
 Fast, Extensible, Touch-enabled Carousel & Slider JS Library – Smooothy