


A pure CSS/HTML image carousel which enables you to loop through a series of images by mouse click. Based on Html checkbox input and CSS :pseudo elements.
How to use it:
The necessary Html structure for the image carousel.
<div class="carousel">
  <input type="checkbox" class="carousel-control">
  <div class="slide" slide="5" annot="Image Annotation 5">
    <img src="5.jpg" alt="Slide 5">
  </div>
  <input type="checkbox" class="carousel-control">
  <div class="slide" slide="4" annot="Image Annotation 4">
    <img src="4.jpg" alt="Slide 4">
  </div>
  <input type="checkbox" class="carousel-control">
  <div class="slide" slide="3" annot="Image Annotation 3">
    <img src="3.jpg" alt="Slide 3">
  </div>
  <input type="checkbox" class="carousel-control">
  <div class="slide" slide="2" annot="Image Annotation 2">
    <img src="2.jpg" alt="Slide 2">
  </div>
  <input type="checkbox" class="carousel-control">
  <div class="slide" slide="1" annot="Image Annotation 1">
    <img src="1.jpg" alt="Slide 1">
  </div>
  <div class="counter" count="5"> / 5</div>
</div>
The basic styles for the image carousel.
.carousel {
  position: relative;
  width: 600px;
  height: 400px;
  overflow: hidden;
  margin: 0 auto;
  box-shadow: 0 2px 6px rgba(0,0,0,0.3);
}
.carousel:hover .slide:after,
.carousel:hover .counter,
.carousel:hover .slide:before { opacity: 1; }
.slide {
  float: right;
  position: absolute;
  z-index: 1;
  width: 600px;
  height: 400px;
  background-color: #eee;
  text-align: center;
  transition: opacity 0.4s;
  opacity: 1;
}
.slide:before {
  content: attr(annot);
  display: block;
  position: absolute;
  left: 20px;
  bottom: 20px;
  color: rgba(255,255,255,0.9);
  font-size: 14px;
  font-weight: 300;
  z-index: 12;
  opacity: 0;
  transition: opacity 0.3s;
  text-shadow: 0 0 1px #000;
}
.slide:after {
  content: attr(slide);
  display: block;
  position: absolute;
  bottom: 0;
  transition: opacity 0.3s;
  width: 100%;
  height: 80px;
  opacity: 0;
  background-image: linear-gradient(transparent, rgba(0,0,0,0.5));
  text-align: left;
  text-indent: 549px;
  line-height: 101px;
  font-size: 13px;
  color: rgba(255,255,255,0.9);
  text-shadow: 0 0 1px #000;
}
.counter {
  position: absolute;
  bottom: 20px;
  right: 1px;
  height: 20px;
  width: 60px;
  z-index: 2;
  text-align: center;
  color: #fff;
  line-height: 21px;
  font-size: 13px;
  opacity: 0;
  transition: opacity 0.3s;
}
The required CSS for checkbox controls.
.carousel-control {
  top: 0;
  right: 0;
  float: right;
  position: absolute;
  margin-top: 0;
  z-index: 9;
  background: #eee;
  height: 100%;
  width: 100%;
  opacity: 0;
  cursor: pointer;
}
.carousel-control:checked { z-index: 8; }
.carousel-control:checked + .slide { opacity: 0; }
.carousel-control:checked:nth-child(1):checked { z-index: 9; }
.carousel-control:nth-child(1):checked {
  float: left;
  z-index: 9;
}
.carousel-control:nth-child(1):checked + .slide { opacity: 1; }
.carousel-control:nth-child(1):checked ~ .carousel-control {
  float: left;
  z-index: 8;
}
.carousel-control:nth-child(1):checked ~ .carousel-control + .slide { opacity: 0; }
.carousel-control:nth-child(1):checked ~ .carousel-control:checked { z-index: 9; }
.carousel-control:nth-child(1):checked ~ .carousel-control:checked + .slide { opacity: 1; }
See Also:
 Touch-Ready, High-Performance Vanilla JS Slider – Pagiflow
 Lightweight Vanilla JS Carousel with Touch Support – Driftbox
 Lightweight Bootstrap 5 Card Slider – AvalynxCardSlider
 Infinite Scrolling Carousel with Momentum Physics – Grab-n-Drag Infinite Carousel
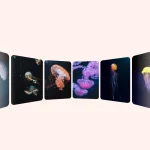 Lightweight Pure CSS 3D Carousel with Fade in/out Effects
 Tiny Touch Carousel Web Component for Modern Apps – Pure Swipe Slider
 Fast, Extensible, Touch-enabled Carousel & Slider JS Library – Smooothy
 Mobile-Friendly Carousel Slider with Responsive Breakpoints – SuperSlider